
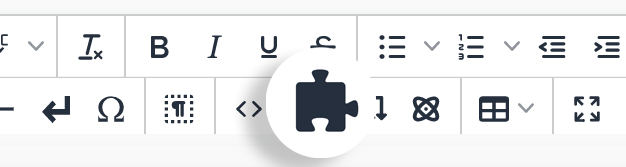
Creating an image overlay
Step 1:
On the page you're editing, click on the Snippets icon in the WYSIWYG Toolbar.
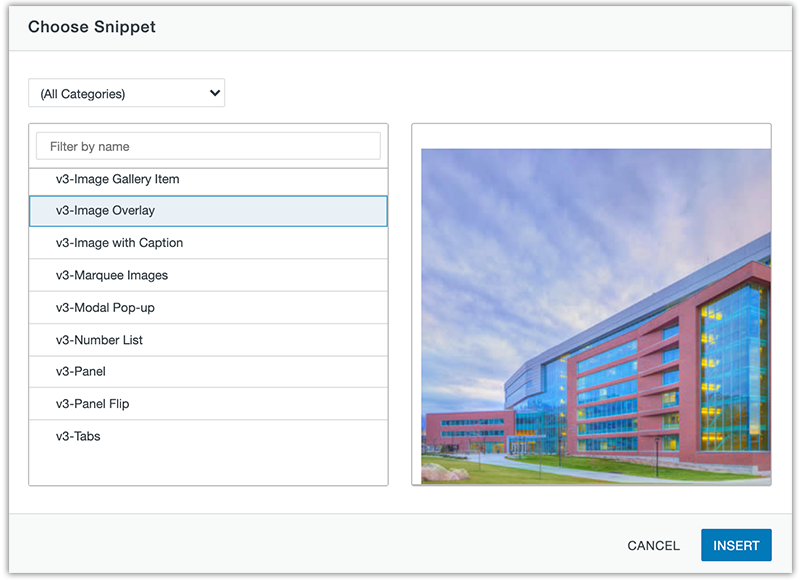
Step 2:
Select Image Overlay and click Insert.
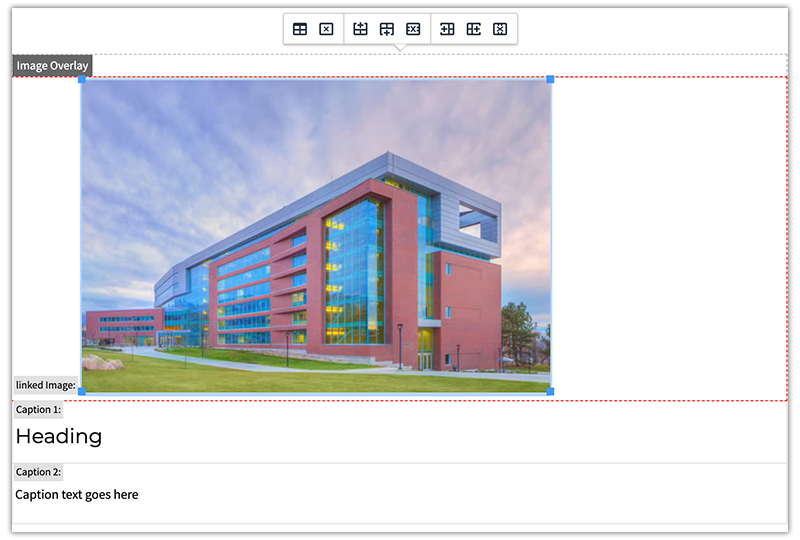
Step 3:
Select the default image and delete it.
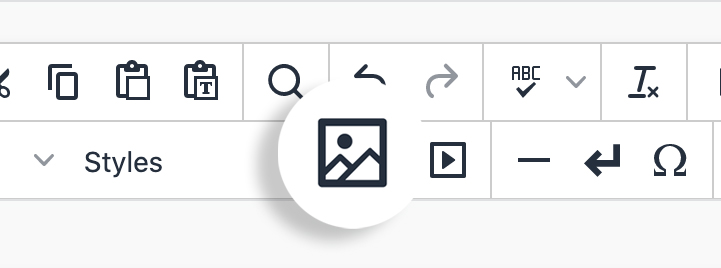
Step 4:
Click the Insert/Edit Image icon in the WYSIWYG Toolbar.
Step 5:
Click on the search file icon to locate and insert the image you'd like to use.

Step 6:
After the image has been selected, add an Alternative description and/or Image title if needed.
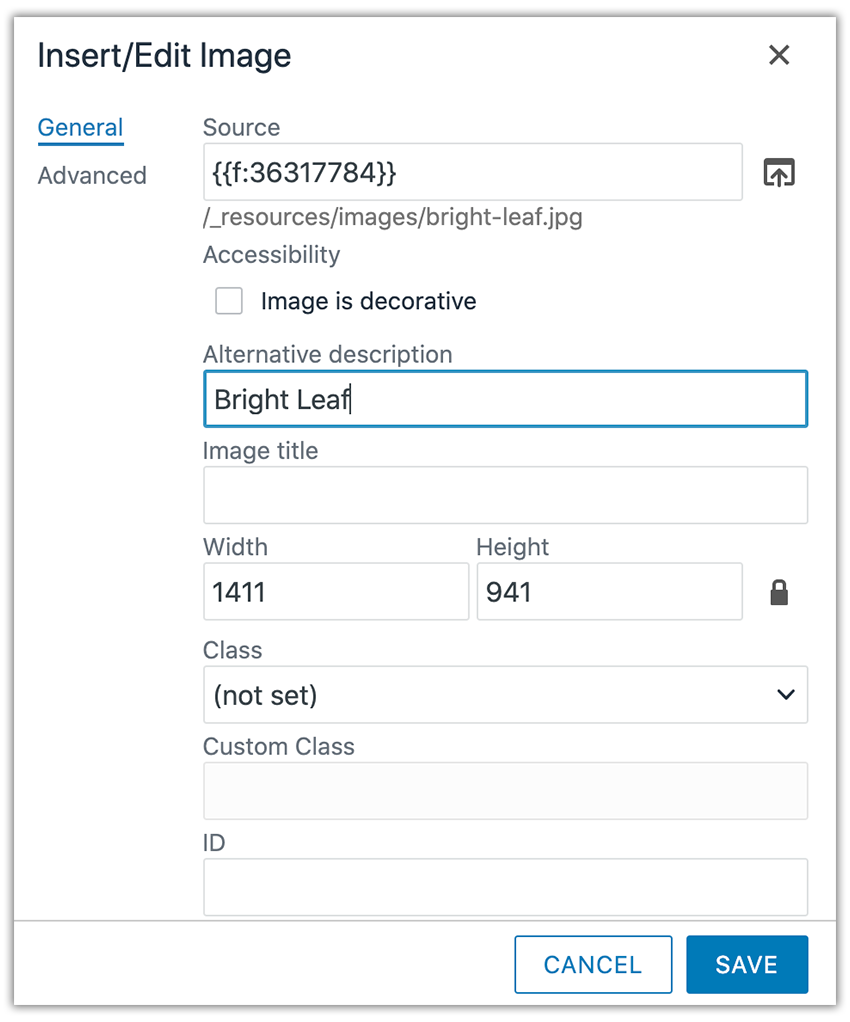
If neither are needed, click the checkbox to indicate that the Image is decorative.

Step 7:
After the image has been inserted into the image overlay snippet, click it and then click the Insert/Edit Link icon in the WYSIWYG Toolbar.
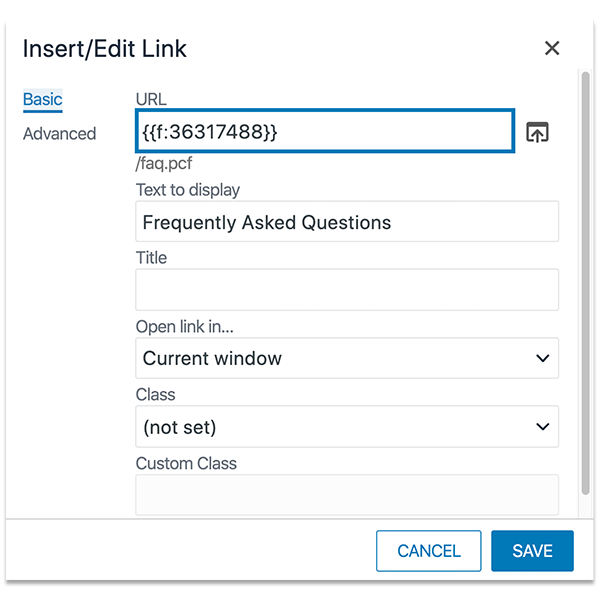
Step 8A:
If you are linking to a page within your site, use the search file icon to locate the page. Then click insert to add the page's dependency tag. Click Save.
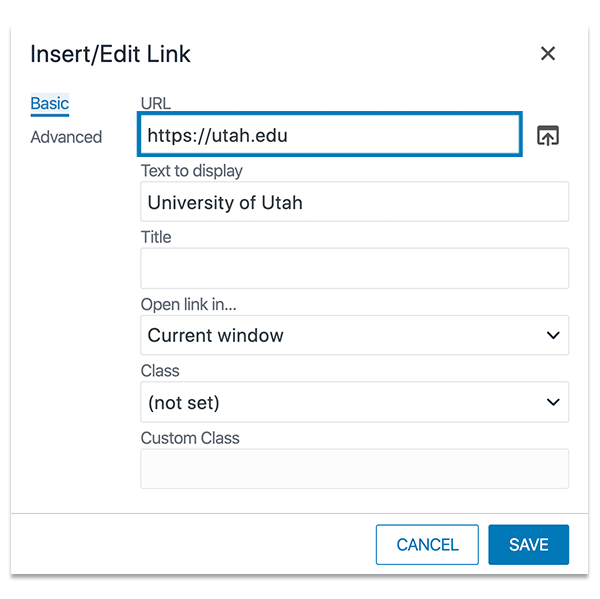
Step 8B:
If you are linking to an external page, type in the full URL in the URL field (ex: https://www.utah.edu). Then click Save.
Step 9:
Save and publish the page to view changes.

Ways to style an image overlay
Add classes onto the Table Properties of the button to create different styles.
