Beyond the Basics: Tables
An introduction to tables
Tables are a great tool for displaying data. Their purpose is to make that data readable, scannable and easily comparable.
Adding a table
Step 1:
Place your cursor on the page where you want to add a table.
Step 2:
Select the table icon in the WYSIWYG Toolbar.

Step 3:
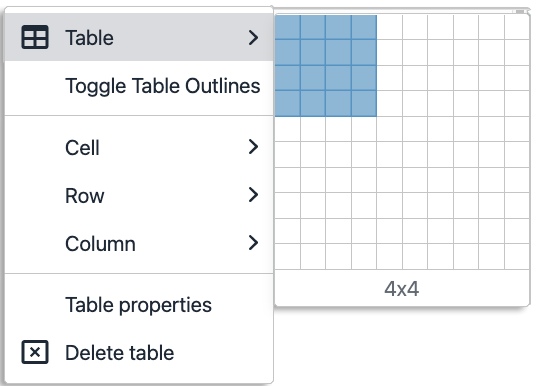
With the dropdown selected, go to Table and insert how many columns and rows you'd like to display.
Step 4:
After your table has been created, select the table properties in the quick icons menu.

Step 5a:
Column headers should be created and updated through the table properties. This will ensure the column headers will be styled correctly and those who use assistive devices can accurately understand the information provided in the table.
To properly mark header cells, highlight the header cells and right click on the row. Go to Cell → Cell Properties. Change Cell Type to Header cell and Scope to Column.
Step 6:
Populate your content accordingly, then click Save to view changes.
![]()
Adding and deleting rows
To add additional rows, use the quick icons menu.
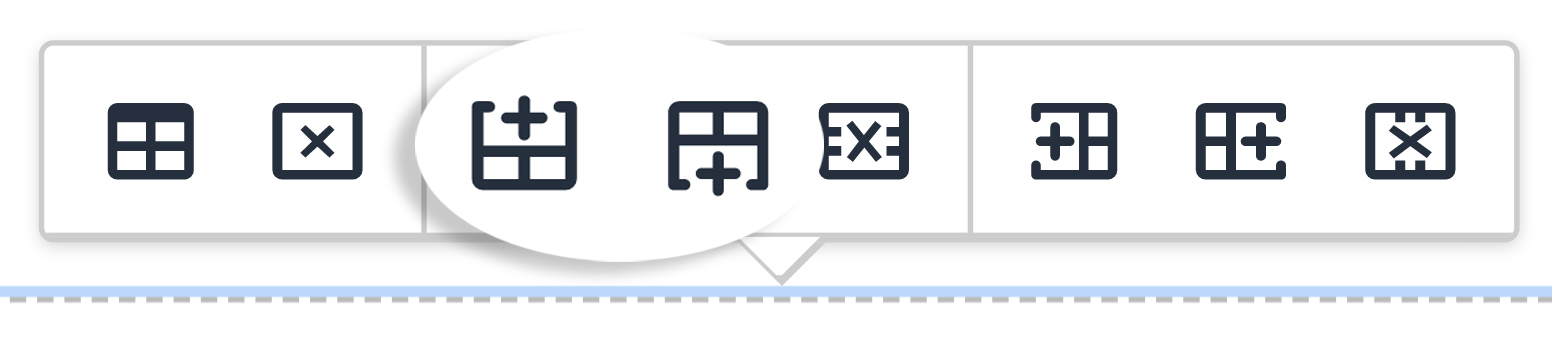
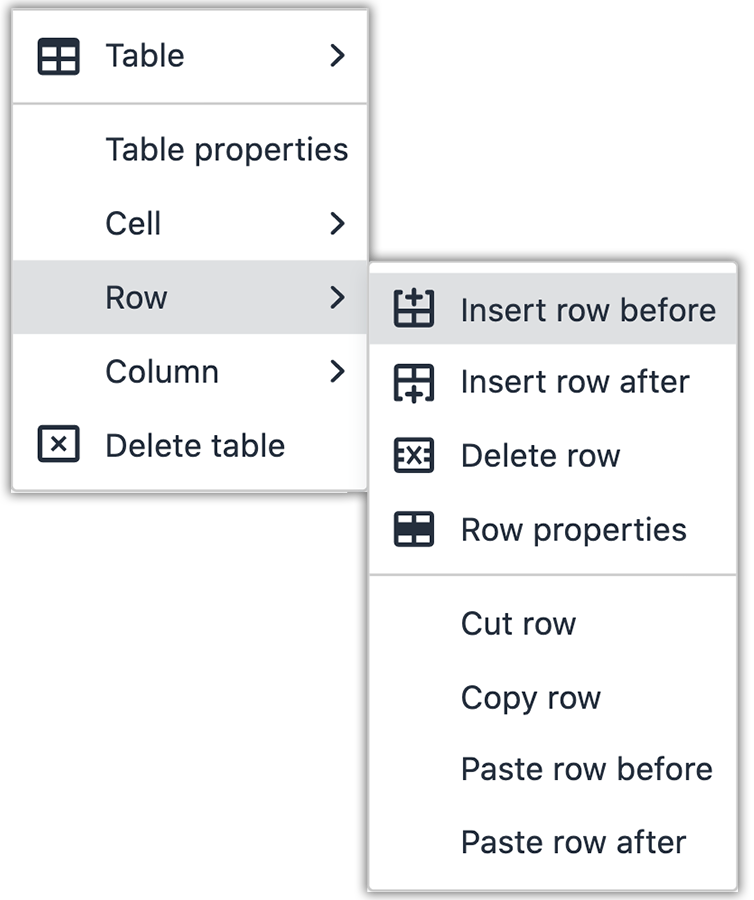
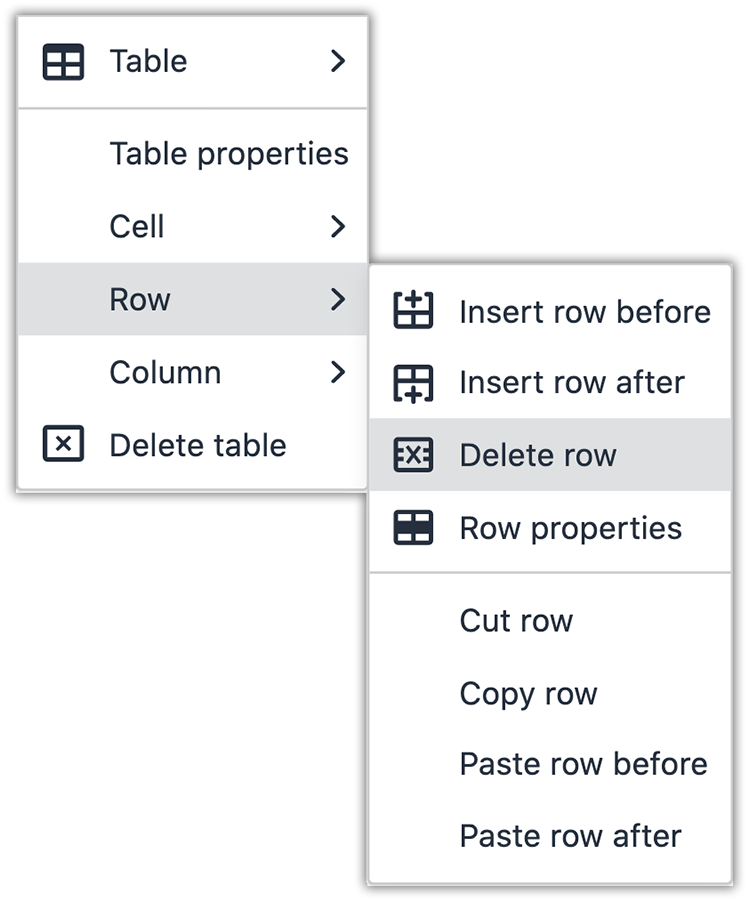
Or right click on the preferred row and go to Row → Insert Row After or Insert Row Before.
To delete a row, use the quick icons menu.
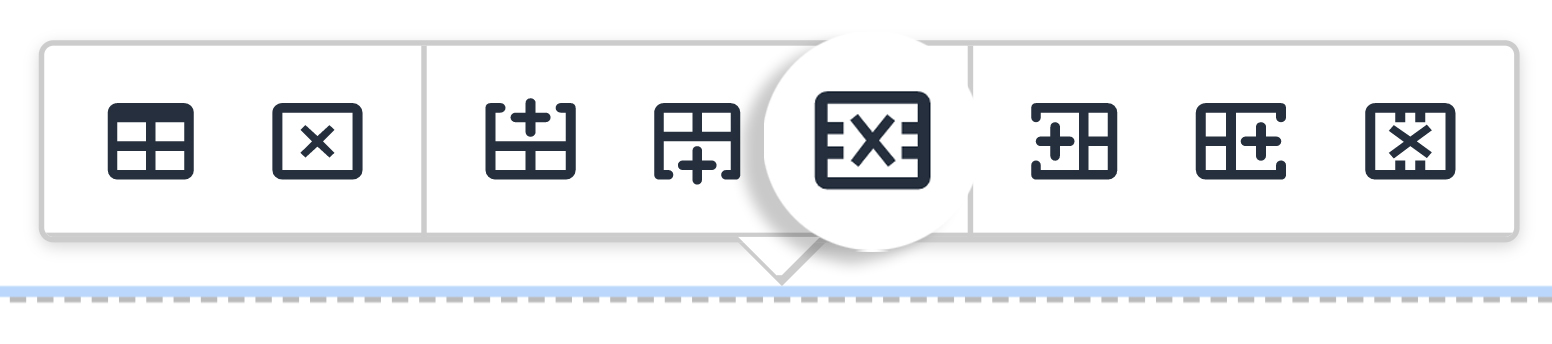
Or right click on the preferred row and go to Row→ Delete Row.
Adding and deleting columns
To add additional columns, use the quick icons menu.
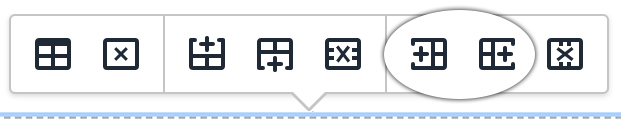
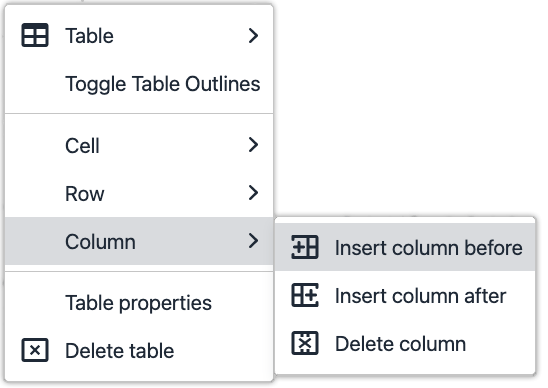
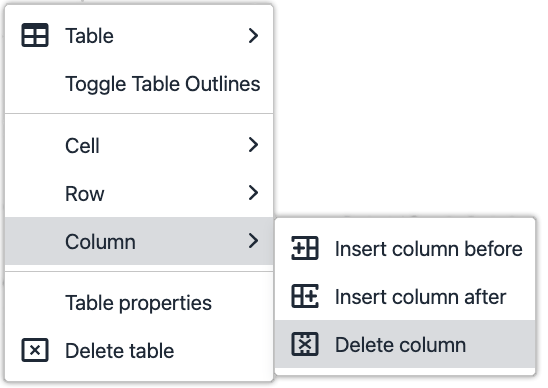
Or right click on the preferred row and go to Column→ Insert Column After or Insert Column Before.
To delete a column, use the quick icons menu.
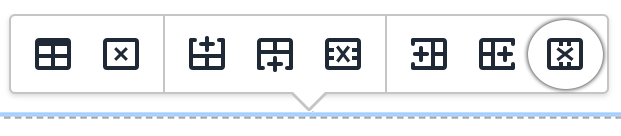
Or right click on the preferred row and go to Column→ Delete Column.
Accessibility
Column headers should be created and updated through the table properties. This will ensure the column headers will be styled correctly and those who use assistive devices can accurately understand the information provided in the table.
Column widths can be defined using either px or % in the table properties.
Generally, percentages are recommend for column width adjustments.
To edit a table or table rows, use the table properties in the quick icons menu.