Beyond the Basics: Embedding Images
An introduction to Images
Integrating high-quality, professional images into a website significantly enhances personalization and user experience. These images contribute to a modern and credible appearance, elevating the overall aesthetic and trustworthiness of the site.
Embedding Images
Step 1:
Upload and publish the image in the appropriate _resources/images location.
![]()
Learn how to upload and publish files through our Adding and Editing Files guide.
Step 2:
Place cursor where the image needs to be embedded and select the Insert/edit image icon.
![]()
Step 3:
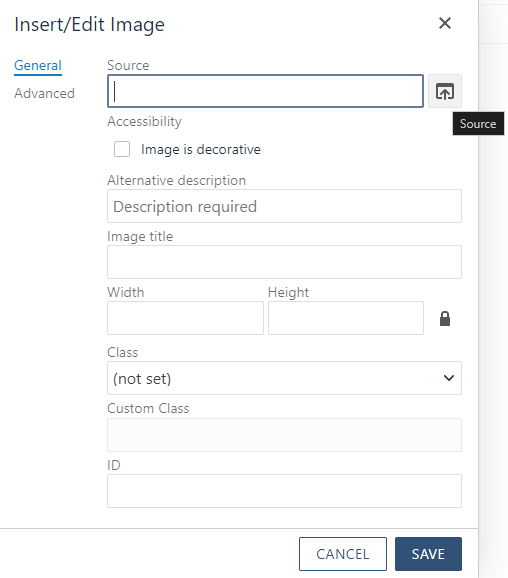
Select the Source icon to the right of the Source text field.

Step 4:
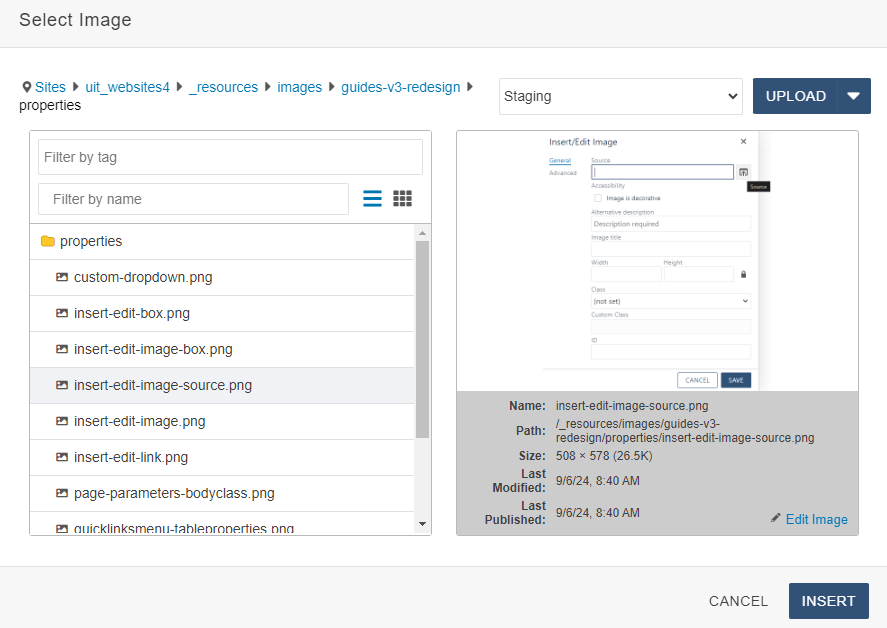
Locate and select the desired image and select Insert.

Step 5:
Add the Alternative description for accessibility and any Custom Classes to style the image.

Please note: The Image title is not necessary and may cause accessibility errors if filled out.
Step 6:
Click Save to embedded image.
![]()
Customizing Images
Step 1:
Select the image that needs to be customized. Then select the Insert/edit image icon.
![]()
Step 2:
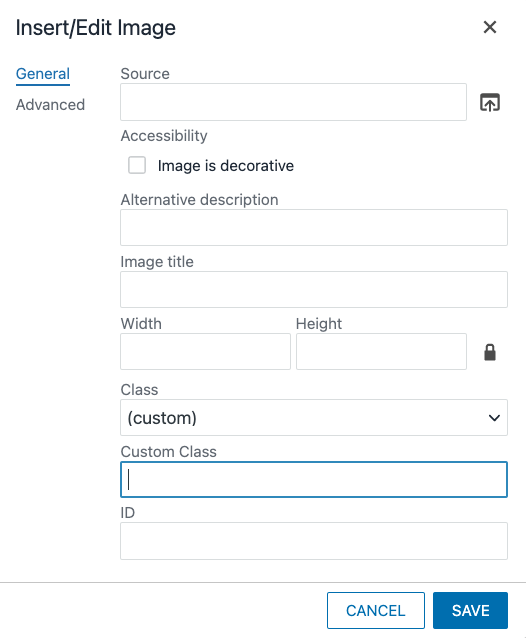
Under Class dropdown, select (custom).

Step 3:
View the Image Helper Classes and add the desired classes to the Custom Class text field.

To add multiple custom classes, separate each class by a space.
Step 4:
Click Save to view changes.
![]()
