FormAssembly: Exporting PDF Submissions
While it is not permissible to use the direct Export as PDF option in FormAssembly as it requires the emailing of potentially personally identifiable information, there are alternate options that those with a data viewer or creator license can utilize.
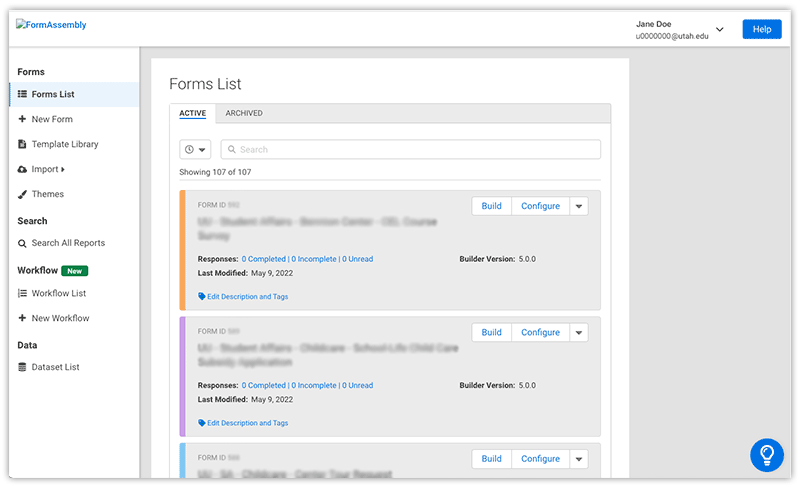
Step 1:
Navigate to the Forms List page and locate the form you wish to export submissions.
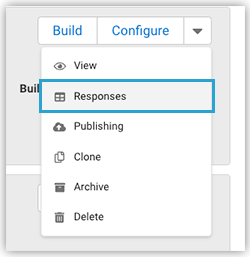
Step 2:
Click the dropdown next to Configure and select Responses.
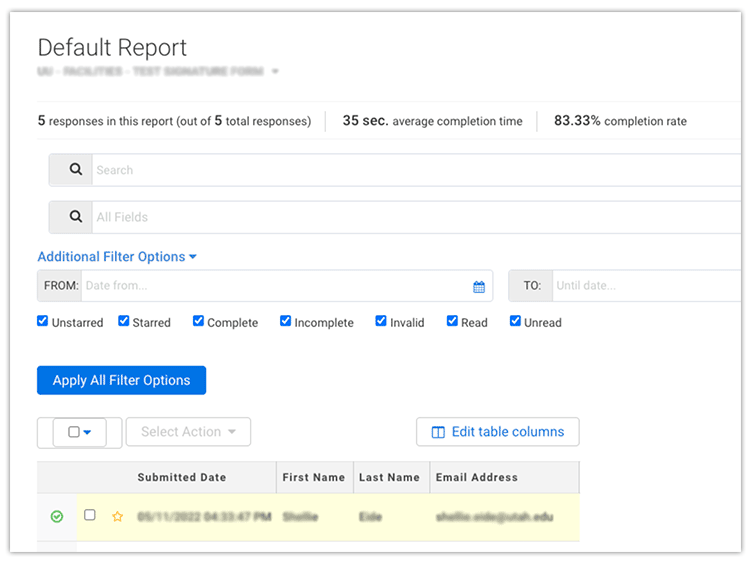
Step 3:
From the Reports page, locate and select the submission you want to export.
Step 4:
On the next screen, locate and click on the Print button at the top of the page. Repeat this action on the following screen.


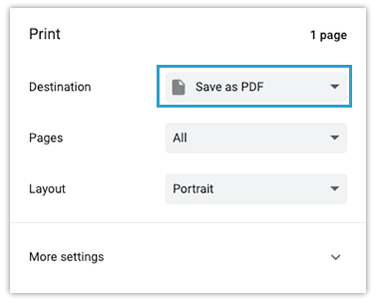
Step 5:
In the print dialogue box, click the Destination dropdown and then select Save as PDF.
Step 6:
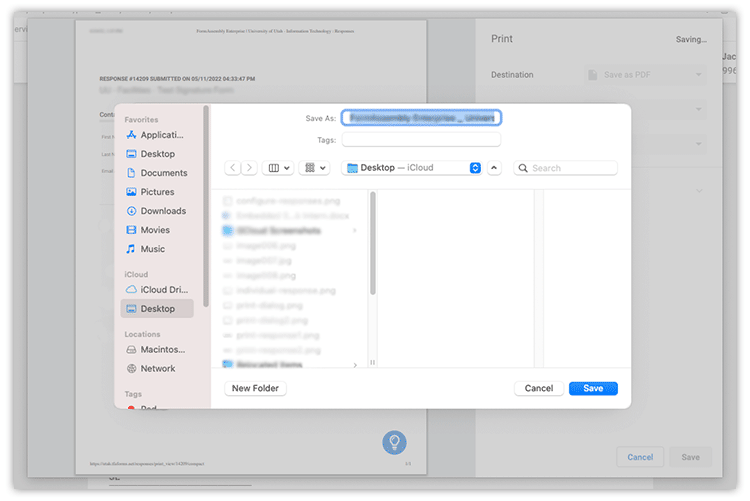
Click the blue Save button.

Step 7:
Follow any additional prompts, including renaming and changing the location to where you would like to save the submissions. Click Save one last time to confirm the save.
Step 8:
Navigate to the location you chose to save the submissions to confirm they have been saved.
Step 1:
Navigate to the Forms List page and locate the form you wish to export submissions.
Step 2:
Click the dropdown next to Configure and select Responses.
Step 3:
From the Reports page, scroll down and then select the checkboxes of the submissions you want to export.
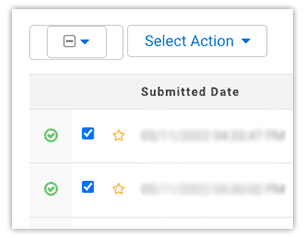
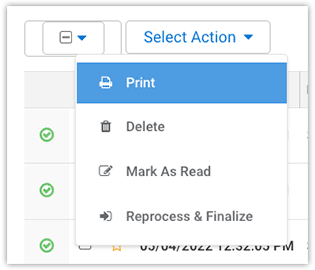
Step 4:
Click the Selection Action dropdown button and then click Print.
Step 5:
On the next screen, locate and click on the Print button at the top of the page.
Optional: Use Print Options to change the way the submissions will display.
Step 6:
In the print dialogue box, click the Destination dropdown and then select Save as PDF.
Step 7:
Click the blue Save button.
Step 8:
Follow any additional prompts, including renaming and changing the location to where you would like to save the submissions. Click Save one last time to confirm the save.
Step 9:
Navigate to the location you chose to save the submissions to confirm they have been saved.
Resources